To declare your survey hooks within a survey open the DatStat Illume Designer and select "Add/Edit SurveyHooks" from the Survey menu (see Figure 1). This will launch the Survey Hooks management panel as shown in Figure 2.
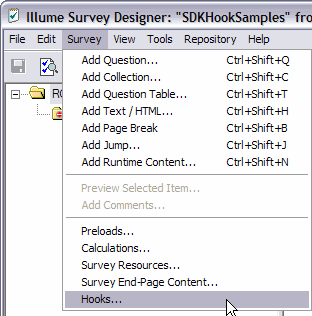
Figure 1
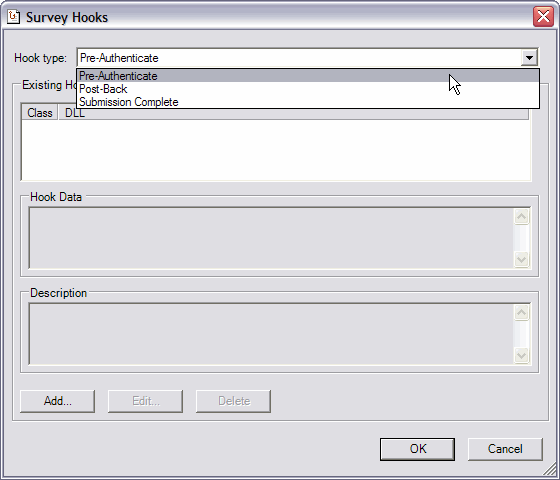
Figure 2
The Survey Hooks management panel is where the survey designer can create and manage all hooks of type Pre-Authenticate, Post-Back, and Submit. Hooks of type Runtime-Content are not managed here but rather are managed in the context of the Runtime Content survey object which encapsulates them.
At the top of the Survey Hooks management panel is a pop-list of the different hook types. This selection will determine what gets displayed in the list of hooks directly beneath it.
To create a new hook declaration, select the hook type desired from the pop-list and click "Add…". You will be presented with the Hook editor as shown in Figure 3.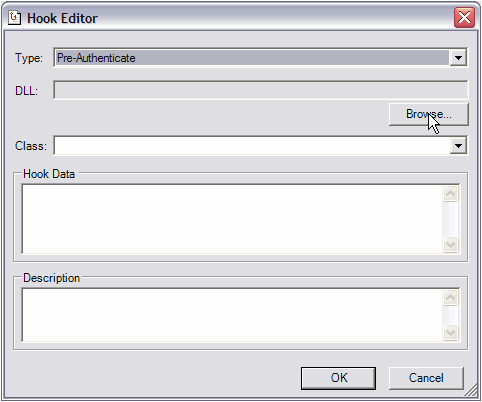
Figure 3
Next, click the "Browse" button to select the DLL that contains the class which implements the appropriate interface for the hook type you have selected (e.g. "Pre-Authenticate"). Upon selecting the DLL, the editor will use reflection to determine what appropriate classes are available within the selected DLL and display them in the pop-list labeled "Class" (see Figure 4).
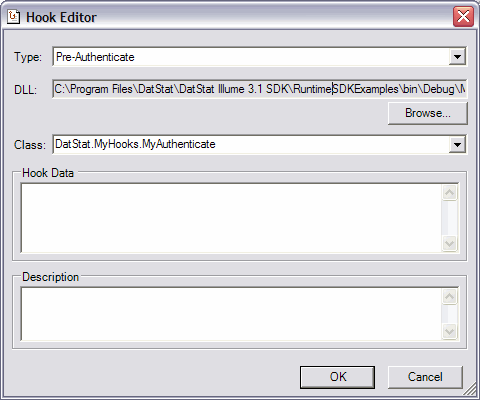
Figure 4
In this example, we have selected a DLL named MyHooks.dll. The editor determined via reflection that this DLL contains the class "MyAuthenticate" which implements the interface necessary for a hook of type "Pre-Authenticate". It is possible for a DLL to contain multiple classes that implement the appropriate interface for a given hook type. The editor will allow you to choose among them using the pop-list.
The Hook Editor has another field labeled "Hook Data" which allows you to pass a string of data into your hook class call via the hook context.
Once you have selected desired class, fill in the hook data to be included with the call if desired, and a description of the hook call and click "OK" (see Figure 5). Your new hook declaration will now appear in the list of hooks shown in Figure 2.
Note that it is possible to have multiple hooks declared of the same hook type. In this case, the hooks will be executed in the order in which they appear in the list of hooks. To change the order, simply click and drag the hooks to their new positions.
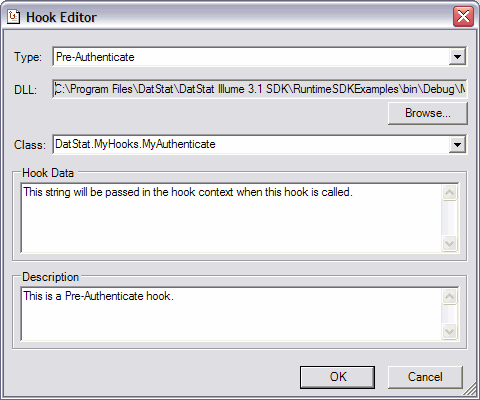
Figure 5
Next: Creating Runtime Objects